11.12.2014

Touring Vietnam & Cambodia with my Pink Ray-Ban Aviator Shades

Hi guys!!! It's been quite a while since I last blogged. I transferred to a new work last July and has been busy since then. I really miss blogging and sharing with you guys my cool shopping finds. Normally, I would post about beauty products that I discover effective, but this post will be about my new Ray-Ban aviator shades that I just bought and my trip abroad last month. I had been in love with it ever since I first saw it. I tried not to give in to temptation but it was futile to resist haha. Luckily, I was able to put my new shades to good use immediately during my Vietnam Cambodia trip. 

What drew me to this pair of shades was actually the unique pink color, and of course the fact that I had been wanting a pair of flash lens for the longest time. I was actually thinking of getting the blue color, but this pink one is the latest model so not a hard decision there. I've been wearing this for the whole duration of my Vietnam Cambodia trip and I would like to share with you some of the pictures. Pardon me in advance for the selfie pictures hehe.

FYI, I bought this pair of shades at the Sunglass Haven, but if you're too lazy to go to the mall, you can also buy this pair online at Zalora. They have lots of eyewear selections from different brands including Ray-Ban, and they also have the pink aviator shades in stock as well. 

Also, if you're planning to go to Vietnam or Cambodia anytime soon, you can check this link out. It might help you decide which tourist spots to go to.

Here are some of my pictures from Vietnam:

Picture with my friends inside the post office

At the fake photo booths inside the post office

Outside the Reunification Palace

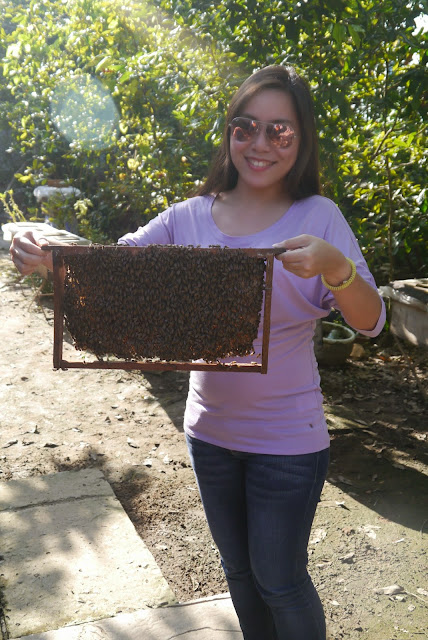
Playing with bees at the Mekong Delta

Here are some of my pictures from Cambodia:

At one of the temple entrances

Just posing outside one of the temple ruins

With my lovely friend Bernice

My best shot of the Angkor Wat Temple

So that's it guys! I hope you enjoyed my simple post and weren't too bombarded with my selfies haha. Hope you can also visit these 2 countries soon as it's really worth the trip. Don't forget your shades as well! :)

Ciao!
Kat <3

6.30.2014

I Won The Beauty Junkee's 5th Ultra Super Mega Giveaway!!!

I rarely join contests online since I'm never lucky enough to win. I even tried to join a blog giveaway wherein the grand prize was an Ipad Air but obviously I didn't win, not even the gift pack consolation prizes (boo!). The first time I won something online was when I became The Beauty Junkee's Commenter of the Month for March. It was such a happy moment for me as I totally wasn't expecting to be picked. Ms. Martha's a very nice beauty blogger who really cherishes her loyal readers. I wanted to meet her personally and get the chance to share stories with her.

Finally met Ms. Martha when I picked up my beauty bag (she's so pretty!)

Fast forward to April, Ms. Martha posted her 5th year anniversary giveaway mechanics. I'm really a sucker for beauty products, and all her prizes were mostly great products from famous beauty brands so I couldn't resist not joining this super generous giveaway. There were a lot of mechanics to follow but I knew that winning this would be super worth it. I allotted 2 hours of my time to finish all of the said mechanics. 

One of the mechanics was to answer this question: What's your most favorite post by The Beauty Junkee? I thought long and hard for the answer as Ms. Martha really has a lot of articles worth reading. After much thought, below is my winning answer to her question. 

My favorite post by The Beauty Junkee would be the Fan Mail Fridays: My Rule When It Comes to Splurging on Material Pleasures. This post really had a big impact on me because I’ve been becoming a bit of a shopaholic lately. After reading your post, it suddenly hit me that I must not forget to save a big portion of what I have earned. This is why your advice, which is the 50/50 Rule, is such a great help for me. I must really thank you Ms. Martha for sharing your financial tips with us. The main purpose why I read your blog is because of your beauty tips and knowledge, but knowing that I also get to read useful life knowledge on how to handle money matters and other topics that help us take better care of our health and body, is more reason for me to be a loyal supporter of your blog. Happy 5th anniversary and more power to The Beauty Junkee!!!

The winners were announced early this June and I wasn't really expecting anything as there were about 300 people who joined and there can only be 12 winners. That's why I couldn't believe my eyes when I saw that my name was also included in the list. My heart was pounding wildly the whole time afterwards. I won Beauty Bag 6 which is really great because most the products are stuff that I can use for myself. I also shared some of the prizes to my family members as well. 

I met Ms. Martha last June 22 at High Street's Coffee Bean and Tea Leaf. It was great as I got to know her more and I even met the other giveaway winners, and some of them are also bloggers as well. Even Ms. Martha's family and cousin Ruth was there who was super adorable and entertained us the whole time. Ms. Martha really is super nice, and she even treated us to a drink from Coffee Bean (talk about generous!). She's really a beauty blogger to be admired and I'm glad that I found her blog.

Ms. Martha's cousin Ruth (she calls herself Mini Martha sooo cute!)

Here are pics with my fellow winners! Just grabbed these pics from their IG accounts as I wasn't able to take a picture using my camera wahh.

Photo grabbed from Marjorie's IG account

Photo grabbed from becomingsleek's IG account

Here's a breakdown of the prizes that I won. Click Read More to see the items!

6.03.2014

Happy Skin's Peppermint Eye Am Here to Stay 24h Gel Pencil Eyeliner


I had been eyeing Happy Skin's Peppermint eyeliner for about a month now ever since its launch. I have always wanted an eyeliner in mint green color but cannot find the exact shade in brands being sold here in Manila. It was a nice surprise for me when Happy Skin suddenly came out with an eyeliner in this color. You would assume that I immediately bought this eyeliner while jumping with glee, credit card in hand to the counter. Well no, that is totally not what happened. What went down was one look at the price made me have second thoughts. Could I possibly spend P499 for an eyeliner in a color that I might not even get to use everyday? I decided to just hold on spending for what might yet be another impulse purchase on my end. 


Okay, after one month of indecisiveness, I finally caved in and bought the darned mint green eyeliner. Well, I couldn't stop thinking about it, and I would always try it on whenever I would pass by a Beauty Bar store. What's the use of stalking it when I can have one for myself right?


I just bought this eyeliner the other day and I can sincerely say that I love it to bits! Here are my thoughts on this wonderful product:

Packaging The eyeliner is a retractable pencil type of product. This is totally convenient as there is no need to sharpen the liner from time to time. As compared to other brands, the pencil is a bit longer than normal. This also means that there is a bit more product here as there is 0.5g of product compared to other brands that only have 0.28g.


Texture As stated in the description, this product is a gel pencil eyeliner. Most gel eyeliners are normally housed in a small round container wherein you would have to use a brush to apply the product to the eyelids. In this case, it's already in pencil form which is quite innovative. You still get the consistency and long wearing effects of a gel liner but it's now easier to use for application. Texture of this product is creamy and it easily dries up in a matter of seconds just as you let it set properly. The color is also very vibrant and applies evenly on the eyelids.


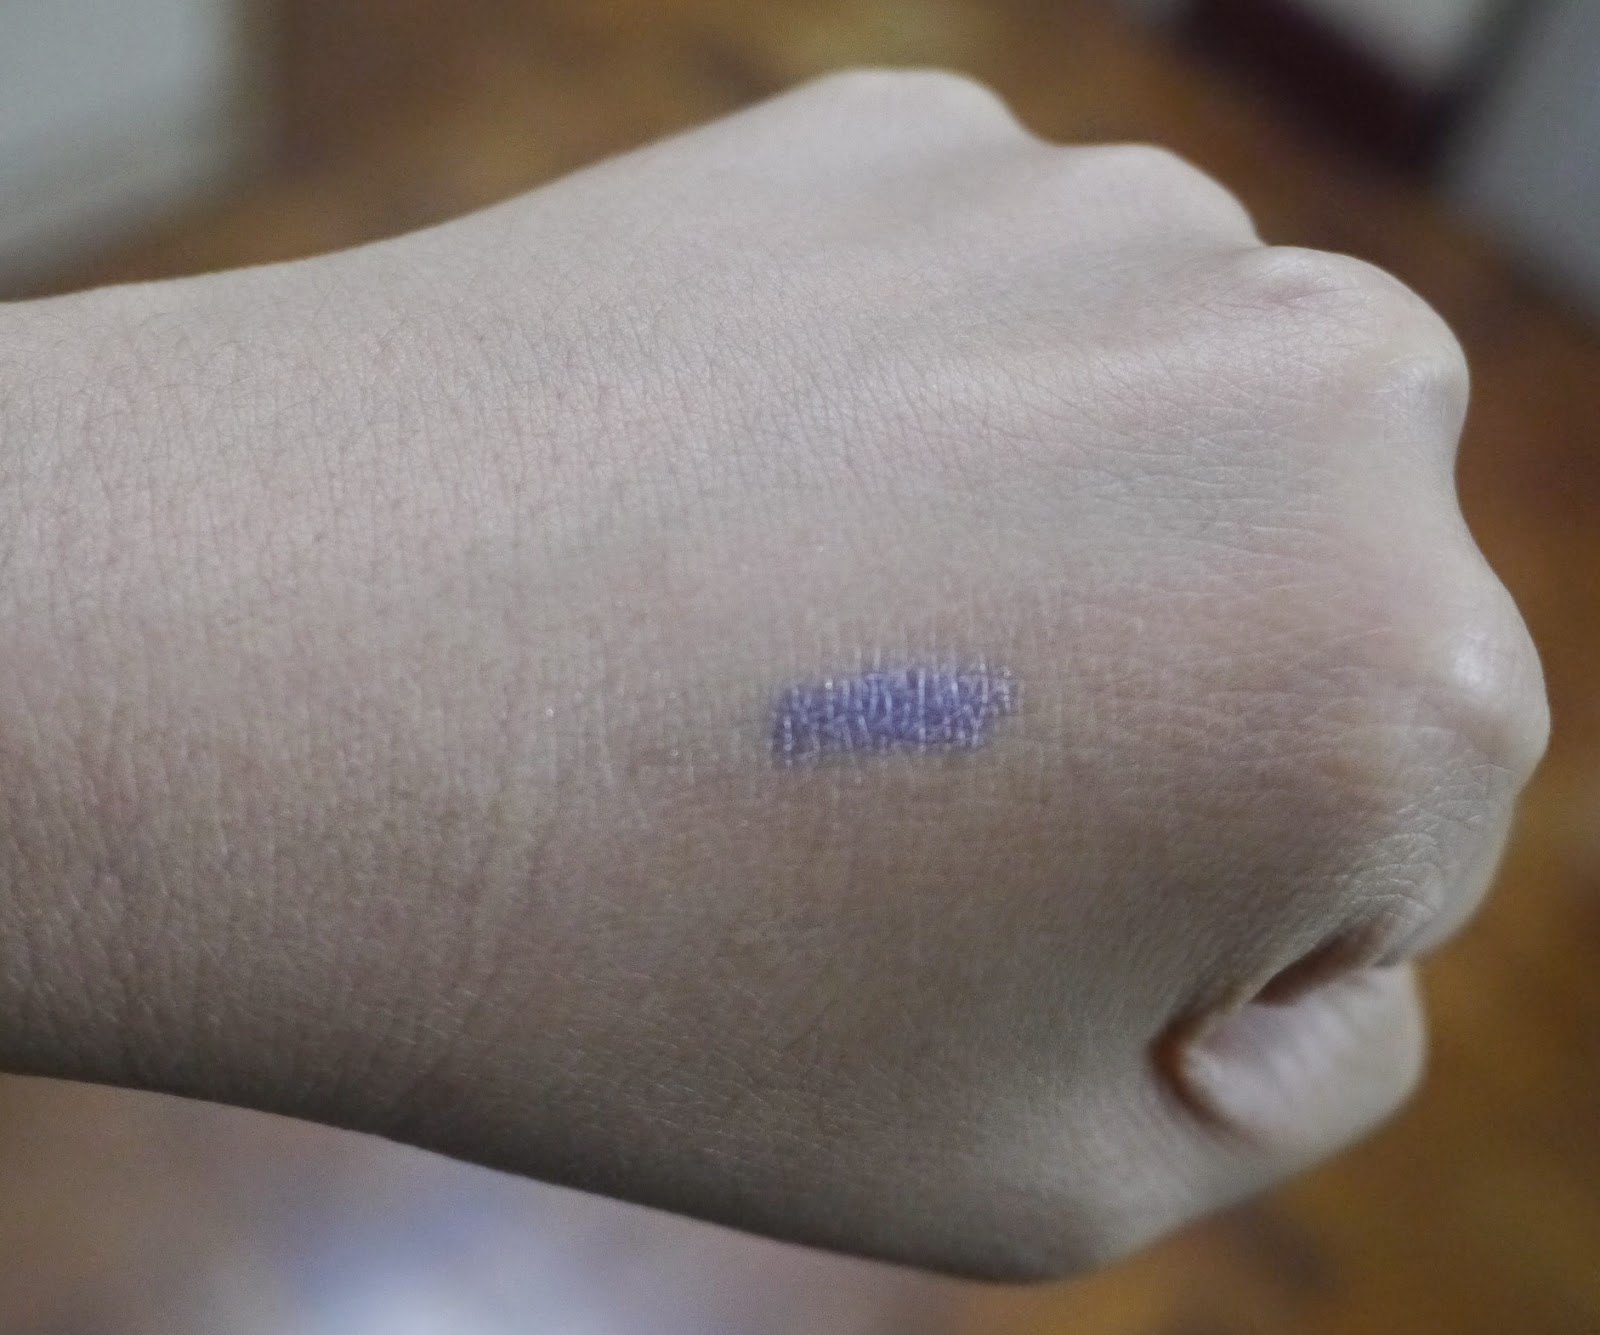
Swatch at the back of my hand

Longevity When it comes to the long-wearing effect of the product, does it really stay true to its description of being a 24hr gel pencil eyeliner? Well, this color is a little hard to pull off when put on top of the eyelids so I put it on my waterline to make my eyes look brighter. However, it didn't stay too long when put on the waterline as it faded away after only 2hrs of wear. So instead, I just put it on my outer lash line as it has the same effect anyway, and it makes the color much more noticeable as well. This way, the color gets to stay on for a longer time. I observed that the color starts to look a bit faded after 5 hours so I just retouch with the eyeliner. 

Applied on my outer lash line

Waterproof? This product is also waterproof as I tested it in running water after I did a swatch at the back of my hand. It's not totally smudge proof though as the color did fade away a little when I accidentally rubbed my eyes.

There you have it, a full-on review of my new favorite eyeliner. It really does brighten my eyes and I do receive a lot of compliments when I have it on. You should try it out as well to see the effect!

Ciao!
Kat <3

5.31.2014

Burt's Bees Tinted Lip Balms in Hibiscus and Pink Blossom Reviews

As stated in my earlier post, I got a free Tinted Lip Balm in the shade Hibiscus from Burt's Bees for attending their workshop. This is actually my second shade from their tinted lip balm line coz I already have the Pink Blossom shade 2 years ago as a gift from my cousin. I would be reviewing both of these shades in this post so that it would be easier to see the comparison between the two colors.


The Burt's Bees Tinted Lip Balm costs P650 each, and there are 9 shades of this product. It's a moisturizing lip balm with a hint of color when applied. This is a very good dual purpose product for gals who have dry lips and are not keen on applying lipstick. This product really helps hydrate the lips while giving it a small burst of color.


Hibiscus The shade of this lip balm is a reddish brown color, somewhat like the shade of Revlon Adore, except that this is on the sheerer side. Even though the color is sheer, it still shows up on my lips. I really love this shade as colors like these really suits my lips. My lips are highly pigmented and I'm so glad that the color shows up well.

Pink Blossom The shade of this lip balm is a light pink color, and it's also quite sheer as well. Applied on my lips, I can't really tell that there is much difference from my natural lip color as my lips are highly pigmented. It does moisturize my lips well, and I consider this as one of my MLBB shades.


What I think of both products:

Texture Application of the tinted lip balm is easy as the texture is smooth and creamy. It does feel hydrating on the lips and it keeps my lips moisturized for a good few hours. I just need to retouch if the lip balm wears off after about 3 hours on me. 

Pigmentation Color is quite sheer, but the hint of color is still noticeable on the lips. The color does stay on the lips if I don't eat or drink. I tried eating with the lip balm on and it got totally wiped off afterwards. Good thing that the ingredients are natural so I'm not worried if I get to intake some of the product.

Taste For the Hibiscus shade, there is no discernible taste at all which is what I prefer for the lip products I use. For the Pink Blossom shade, there is a weird plastic taste which I totally hate. It stays on for quite a while on the lips as well. I am not sure if all the Pink Blossom shades are like this, but it might be because the one I got was manufactured earlier. I'm not sure but maybe the current ones do not have this plastic taste anymore.

Below are swatches of both products on my lips so that you can compare. I am totally in love with Hibiscus and might be using this color more often nowadays.

Swatch of Hibiscus

Swatch of Pink Blossom

Top: Pink Blossom, Bottom: Hibiscus

Hope this product review helps you in choosing the right shade of lip balm. Till the next review!

Ciao!
Kat <3

5.30.2014

My Burt's Bees Experience with Project Vanity

I have been an avid reader of Project Vanity's blog ever since last year. Her blog has really helped open my eyes to the wonderful world of makeup and skincare. It's also one of the reasons why I am concentrating on reviewing beauty products on my own blog as well. It has become such an interesting topic for me that I am totally hooked on anything beauty related. 

I've always wanted to meet Liz, the writer behind Project Vanity, so when I read in one of her posts that she's hosting a Burt's Bees workshop at Beauty Bar Glorietta, I immediately grabbed this once in a blue moon opportunity. She did host some past workshops for other brands before, but I was always busy during those times and missed the chance to meet her. This time, I made sure to set aside time for the workshop.


So, here's what went down at the Burt's Bees workshop!

My friend and I arrived at Beauty Bar Glorietta at about 340pm, but the workshop was scheduled to start at 4pm. Liz arrived at exactly 4pm. It was really great to finally meet her! She was very nice and started to talk to the attendees. She asked for our names and started to converse with us about anything under the sun, but mostly topics related to beauty of course. We waited a bit for the others and the workshop officially started at 415pm.


Maymay Samson of Burt's Bees gave us a brief background and history of Burt's Bees before we headed on to the main purpose of the workshop.


The Burt's Bees workshop is to introduce their new line Daisy White. Liz introduced to us all the uses of this new skincare line. There are basically 5 Daisy White products namely: facial wash, toner, serum, moisturizing cream, and eye cream.


Liz demonstrated to us how to use these products by calling for a volunteer from the attendees. While explaining the different uses of these 5 products, she was putting on the Burt's Bees Daisy White products to the face of the lovely lady.

As per Liz, most Filipinas only recognize one skincare product which is the facial wash. This is quite true as this was also my only regimen before. It was just last year that I started to incorporate toners, serums, and creams into my night regimen. Liz introduced to us the double-cleanse routine which is to use toners after cleansing the face with facial wash. This is to ensure that no trace of dirt is left on the face. 


After double cleansing, it's time to put on the serum. The reason why serums have a watery texture is for the skin to better absorb it. Serums can penetrate moisture and nutrients deeper into the skin to make it feel even more hydrated. Afterwards, apply the moisturizing cream to the face. The purpose of the moisturizing cream is also to make the skin feel hydrated as well, but the structure of the cream is quite thick and cannot be absorbed fully by the skin. This is why it's better to apply both serum and moisturizing cream to make the results doubly effective. When you wake up in the morning, your face will surely feel all soft and supple.

Last but not least, slather on some eye cream before going to sleep. Liz explained that eye creams have a thinner texture than moisturizing creams which is designed specially for the eyes. Moisturizing creams have thicker textures which is why they are not to be used near the eyes as it could lead to tiny bumps emerging in the skin. She also demonstrated using her fingers how to rub the eye cream correctly so that it would be better absorbed by the skin near the eyes as it could feel heavy once it's just sitting on top of the skin. Just massage your eyes using your finger in a counterclockwise manner for the left eye, and in a clockwise manner for the right eye.


A small Q&A portion followed afterwards, then we also had a group picture taking done. All the attendees received a small gift pack as thanks for attending the workshop. I got the Tinted Lip Balm in Hibiscus shade. I already have this tinted lip balm in the shade Pink Blossom. I will be reviewing both in a separate post for comparison. I'm very happy that I got to take a picture with Liz from Project Vanity, and also with the event's official photographer Shaira Luna.

With Liz of Project Vanity

With official photographer Shaira Luna

Small gift for all attendees

I'm really grateful to Liz for giving us the opportunity to attend workshops like these. I feel that my time spent in the workshop was really fruitful as I got to learn a lot on how to apply skincare correctly. I will surely be attending her future workshops as well.

By the way, the Daisy White line is having a promo of 20% off from May 1 to 31. If you've been wanting to try this out, I suggest you go to your nearest Beauty Bar now.

Ciao!
Kat <3

5.16.2014

Lavender Eyeliner: Essence Kajal Pencil in Everybody's Darling

Lately, I've been hooked on the music app Spotify. It's really cool that I can get to make my own playlist, and there are lots of different music genres to choose from. There are even songs that range from OPM to Korean to Chinese. It's like an all-in music application that any music lover would enjoy. You do need the internet to be able to play the songs if you download the app for free, but if you purchase Spotify Premium for about P130, then you will be able to play the songs even when you're offline. Nice right?

Moving on to the product for review, it's the Essence Kajal Pencil in Everybody's Darling. This is an eye pencil in a very pretty lavender shade. I just bought this product on a whim during one of my trips to the Essence counter. I was buying their retractable eyeliner when I caught sight of this eye pencil's lovely color. The price is super affordable at P79 so I immediately picked this up.


What do I think of this product?
Before purchasing this, I just did a swatch of the product at the back of my hand and it was the color that prompted me to buy it. I kind of regretted not giving it a trial run on my eyelids. The product is easily removed when accidentally wiped by the hands. It's not smudge-proof or waterproof at all. 

Application is easy though as a few swipes really makes the color come out. Also, if you're really really careful in trying not to hit your eyes once this is applied, it does last quite a few hours. For those with oily lids, this product might not be for you as this is prone to smudging.


Will I repurchase?
I don't think so as I would like something more long-lasting and won't budge when applied. The price point is quite affordable though and I don't feel super bad that I bought something not of high quality. For the price, I can do with the overall quality of the product.

Tip when applying
Apply it over black eyeliner. In the below photo, Everybody's Darling is applied on top of Majolica Majorca's Pearl Black Perfect Automatic Liner.


There you go! Maybe you've been looking for a lavender eyeliner all this time. I hope this post helped!

Ciao!
Kat <3

5.08.2014

Mother's Day Promos from Makeup Brands

Reading has become such a pastime of mine lately that some of my friends and I have formed a small book club. The latest book we have decided on reading is Flowers for Algernon. It took me about two days to finish the whole thing. It's a really great and unique story about a retarded adult and his quest to become smart via a scientific experiment. His willingness to learn made him the perfect subject. Through his journey, there have been a lot of ups and downs when he indeed started to become smart. Will the experiment become a permanent success or will it be fatal for his brain? Well, start reading if you're curious about the story. :)

Moving on to the main topic.. It's Mother's Day this Sunday, do you have a gift for your beloved mom already? Not yet? Ohh myy, you'll have to start shopping as soon as possible. If you're thinking of buying her some makeup, then here's a bunch of Mother's Day promos that you can avail from different cosmetic brands.

Inglot: The lip set will be priced at only P2450, while the nail set is priced at P2590.


Estee Lauder:


Majolica Majorca:


So here are the promos I managed to look up. The other brands don't really have promos for this special occasion. Hope this post helps you in finding the perfect gift!

Ciao!
Kat <3

5.07.2014

Revlon's Kiss Me Coral Super Lustrous Lipstick: Fiery Coral for Summer

Starting this year, the Super Lustrous Lipstick line of Revlon has cut their prices down by a hundred bucks. So instead of P450, you just have to pay P350 for a lipstick. That's really great news as the formula for this line really suits my lips. I went to the Revlon counter to check out the different shades so that I could purchase a coral shade. Coral has been my go-to shade this summer, and I wanted to add another one to my collection.

I kinda got sidetracked with all the wonderful shades and it was hard to choose. I also tried on the popular shades like Really Red and Cherries in the Snow, but in the end I still went with a coral shade. I really wanted to get the shade Coralberry but unluckily the Revlon counter I went to didn't have that shade. I finally decided on getting Kiss Me Coral instead which I don't think is a super popular shade, but it's no big deal as what's important is that the shade suits me.


Here's what I think of this lipstick:

Color Kiss Me Coral is an orange-red shade and the orange color is more dominant than the red. I believe that I made the right choice as I already have many red shades, and coral is definitely the color I'm keen on wearing right now.

Packaging I like that the packaging is plain black with gold in the middle as it looks quite luxe for the price. It's also helpful that there's a transparent area on top so that you can see the shade that you are looking for immediately. 


Texture The Kiss Me Coral shade is under the creme variant of the Super Lustrous line, and as the name suggests, this shade does have a creamy texture. This is a good thing as the color easily transfers to the lips, and it applies evenly as well so there's no patchy areas on the lips.

Pigmentation This shade has good color payoff, and one or two swipes can really bring out the color. The color stays on the lips for a good 4 to 5 hours. Once I start eating or drinking, then the color starts to fade easily and I would need to retouch immediately.


This is such a lovely color, it's definitely one of my go-to colors lately. It would be great if you get to try out colors like these as well.

Hope you found this post useful!

Ciao!
Kat <3

5.03.2014

The Mount Pinatubo Adventure

During this year's Holy Week, instead of taking trips to the beach or just chilling out, I decided to go on a hiking trip with my relatives to Mount Pinatubo. I believe that trekking is good exercise for the body. This is actually my second time to visit this place. I had fun the first time which was last year's March 2013, but we only hiked for a short while because we took the shortest trail possible. It just took us about 1 hour roundtrip for a hike to and from the crater.

For my second hike at Mount Pinatubo this year, I was actually surprised that the shortest trail is not as short as the 1st time anymore. For a roundtrip hike to and from the crater, it took us about 3 hours. The time of trek also depends on your endurance and how fast you can walk amidst the very rocky road. Honestly, my feet hurt after all that trekking not because of the long walk, but because of the sharpness of the rocks we were walking on. Thank goodness for the 4x4 vehicle that we rode on for more than half of our trip, or else my feet were gonna fall off anytime soon.

Just a little trivia: Mount Pinatubo erupted June 15, 1991, and lasted for nine hours. The volcano ejected not only ashes but also sulfur dioxide. During the hike, there can be seen some orange particles on the ground which is actually sulfur. Due to the strong eruption, numerous earthquakes were created because of the collapse of the summit of Mount Pinatubo which resulted in the creation of a caldera. The caldera is what we are now referring to as the crater of Mount Pinatubo. To clarify, the caldera is not the same as the crater because the crater is where the lava comes out whereas the caldera is formed by the collapse of land following a volcanic eruption. So, I guess what we are really seeing during our Pinatubo tour is the caldera and not the crater. Correct me if I'm wrong though.


We coordinated directly with the staff from Pinatubo, and luckily a lot of other people were also going so the rate we got was P2050 per person. If you want to go on a Mount Pinatubo adventure as well, just contact Sonia Bognot at 0932-6094226. She's the one directly handling the Pinatubo tours. She's very nice and has a lot of stories to share. The food for breakfast and lunch are already provided by them. The tours are year-long except for the rainy seasons. Just call them up to ask for their available tour dates.

Here is the timeline of our hiking adventure:

3am - wait at designated meeting place for the van to pick us up (in our case it's the gas station near my cousin's house)

4am - van finally came (the reason the van was late was because they picked up other passengers as well)

6am - arrived at area for orientation (restroom break with charge of 10 pesos per person)


630am - filled out waiver forms and listened to orientation


730am - Adventure starts now!!! Rode 4x4 vehicle


8am - stopover for 5 to 10 minutes to take pictures


840am - get down from 4x4 vehicle to start trekking


905am - reached 1st stopover (ate breakfast here)


955am - reached last stopover (1km to crater)


1015am - 10 minutes left to crater


1030am - Finally reached crater!!!


1050am - Rest at the stopover huts by the crater (ate lunch here)


Crater Pics:


1120am - start hiking back

1pm - rode 4x4 vehicle again

210pm - returned to area of orientation

250pm - van starts departure back to Manila

5pm - Back in Manila!!!

So this is the whole adventure! It might seem easy but really it's very tiring especially since the sun was scorching hot that day. It's such a unique adventure because really where do you expect to find a tour for erupted volcanoes? Grab the chance to try this out while you're young or still have the energy to. 

Hope you enjoyed this travel post!

Ciao!
Kat <3
LinkWithin

Related Posts Plugin for WordPress, Blogger...